When you have multiple devices connected to a router, you have the advantage of tracking its history and also accessing websites that have been visited by different connected devices earlier.
If you have ever thought how to check WiFi router history from your device, this post is for you.

So, How to Check WiFi Router History?
Here are the steps you need to follow to Check WiFi Router History:
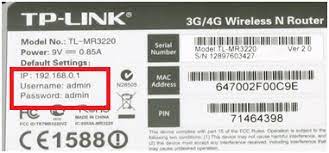
- Check your router and find out the IP address. It should be printed somewhere and is an 8-digit number.
- Press Run key, type cmd, and click OK. The Command Prompt window appears and you have to enter the command in the next step.
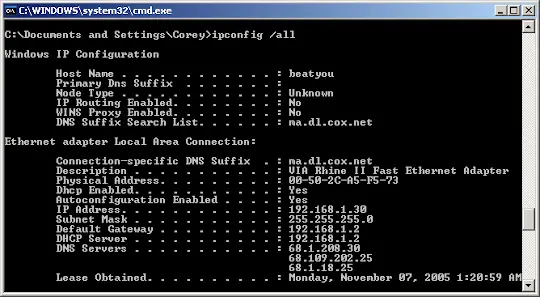
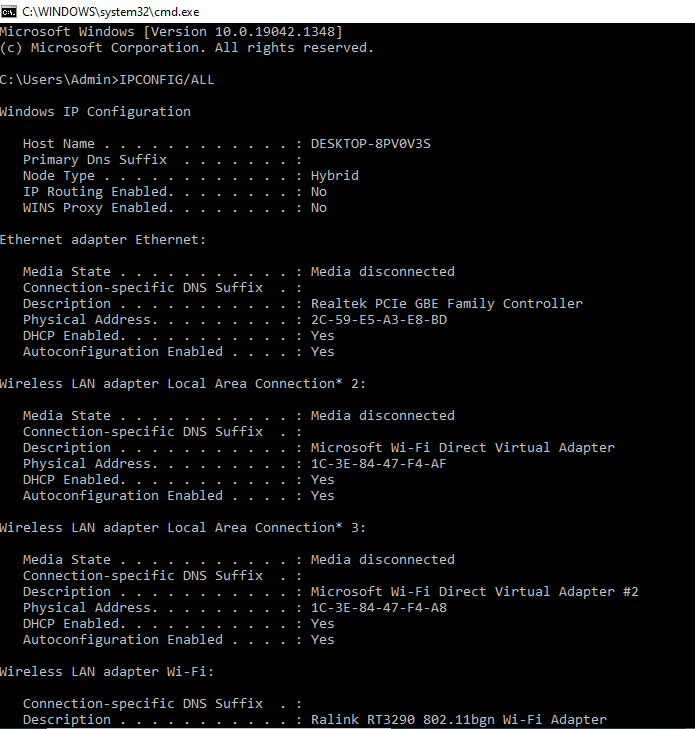
- Type IPCONFIG/ALL and tap Enter. IPCONFIG command displays existing network configuration values so you know how many devices are connected.
- Remember to check if your IP address is accurate by verifying the DHCP server and default gateway.
- Go to the web browser and then type the IP address.
- Hover onto the router login page with admin credentials.
- The next screen lists several menus out of which you should hover on to the history viewer to check out WiFi router history.
Having known the easy way, let us find out how to do it and also know other ways by which you can check WiFi router history in an acceptable way.
Different ways to check WiFi router history
Like I mentioned earlier, you have the easy way and there are other accurate ways to find out WiFi router history. It only depends on your purpose and expectations upon doing the activity.
Some might want to chuck away viruses and determine sites indulging in suspicious activities. A few others might want to know if there is any unauthorized user connecting to the router.
Draft your reason and then use one of the methods to be listed in this article.
1. Check WiFi router history using Command Prompt
You can use Command Prompt to find out WiFi router history easily. Perhaps, Command Prompt can be easily accessed from all our laptops and desktops without any hassle.
So, how to check WiFi router history for visited sites?
- Check your router and find out the IP address. It should be printed somewhere and is an 8-digit number.
- Press Run key, type cmd, and click OK. The Command Prompt window appears and you have to enter the command in the next step.
- Type IPCONFIG/ALL and tap Enter. IPCONFIG command displays existing network configuration values so you know how many devices are connected.
You can notice from the screenshot that a lot of information is displayed about your network connection and adapter.
4. Remember to check if your IP address is accurate by verifying the DHCP server and default gateway.

The highlighted part shows your IP address.
5. Go to the web browser and then type the IP address.
6. Hover onto the router login page with admin credentials.
7. The next screen lists several menus out of which you should hover on to the history viewer to check out WiFi router history.
Remember that, this is the same area where you can also find attached devices and their respective IP addresses. It is also feasible to obtain detailed history including sites accessed and actions performed with the help of the history viewer option.
2. Using a third-party tool
There are third-party tools like FamiSafe that help in tracking multiple mobile phones and tablets being used within the community.
As soon as the device is connected to the router, the tool is also enabled. This type of tool lets you apply parental controls and also access web history containing sites accessed by all devices in the same network.
The advantage of using a third-party tool is that you can monitor from anywhere and apply geo-fencing controls without having to be present at the actual location.
3. WiFi router history using WireShark
Wireshark is yet another packet capturing tool that helps in determining the browser history of devices connected to a router. You can hover onto promiscuous mode and then monitor network traffic. With Wireshark, you can see everyone’s search history that is connected.
If you have access to this tool, here is what you should do to check WiFi router history using WireShark.
- Open Wireshark tool.
- Select the network interface the device is connected with.
- In the top area of the window, you have to type “tcp.port == 80”.
- Press Enter. This operation performs packet filtering of the traffic.
- Type the IP address and press Enter.
- You can notice a range of sites being accessed. If you select a particular site, it is feasible to get specific information/log associated with the same.
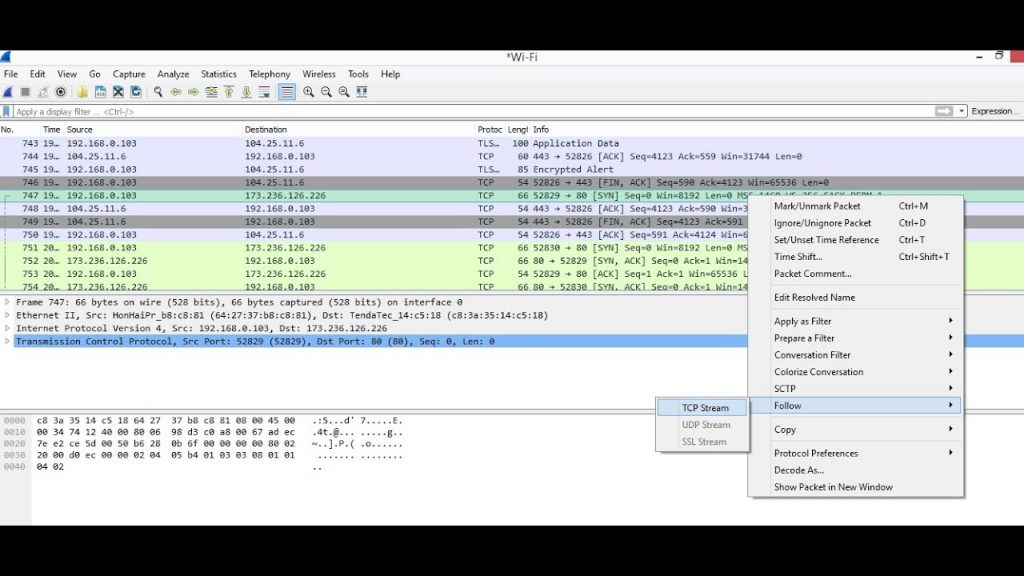
Note: At any instance, remember to turn on promiscuous mode or the problem remains unresolved.
How to check WiFi router history on Android?
To check WiFi router history on Android, the best method is to make use of an open domain name service (DNS). Follow the steps below to quickly access the WiFi router history from your mobile device easily.
- Go to Settings and tap on WiFi.
- Choose the WiFi you are connected with and long-press on the network name.
- Choose Modify Network.
- Choose Advanced Settings.
- You can now see an option to alter IP settings. Change it to Static.
- Enter DNS resolver values. In general, these values are 208.67.222.22 and 208.67.220.220.
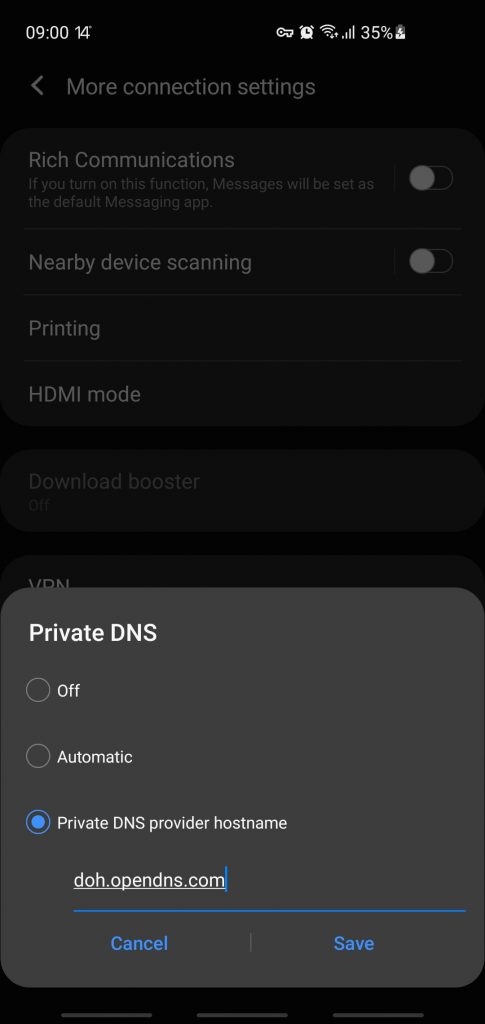
- Tap on Save.
Now, an account is created for you on OpenDNS and this means that you can log in to your router’s admin dashboard with these credentials.
All incoming and outgoing logs connected with the WiFi router can be accessed through this method.
While this can appear like a long method to access history, there’s no easy way to do the same.
Can a WiFi router see your history even in incognito?
Gaining access to WiFi router history is now feasible by following a few steps. But, what happens if sites are accessed in incognito mode?
Unfortunately, the incognito mode also makes note of cookies, site information, and form while internet traffic logs don’t get stored. The incognito mode also takes care of stopping the WiFi router from noting down browsing history.
Remember, there are exceptions in this process. There are school networks that block specific sites from access.
This is when your system needs to be cautious as the admin might charge you for misconduct.
On the other hand, you should also be wary of using incognito modes in public networks since such networks are prone to cyber threats.
How to delete WiFi router history?
Having found ways to access the WiFi router history from the system and mobile devices, it is also high time that you understand that it is feasible to delete WiFi router history periodically.
Follow the steps below.
- Open the web browser.
- Login to your local router.
- Choose Advanced.
- Select System and then tap on System Log.
- Click Delete All.
- To confirm the deletion, select Yes.
This implies that the entire log is deleted. You can choose to decide on the period to delete WiFi router history. However, deleting the history always leaves you in a comfortable space.
Final thoughts
When you have multiple devices connected to a router, it is quite essential for the network admin to constantly assess the WiFi router history in order to control suspicious activities.
You can use a laptop or tablet or mobile device to access the history. However, it is essential to note that you cannot retrieve WiFi router history if sites are accessed using incognito mode.
Go ahead with the easiest method of using the web browser and you will find that working better! Before you go, check out our fix of spectrum router red light issue!
